|
CURRENT ISSUE
SUBSCRIBE
CONTACT US
ADVERTISING
SEARCH
BACK ISSUES
CONTRIBUTORS'
GUIDELINES
THIS WEEK IN
CALIFORNIA WILD
|
Activites
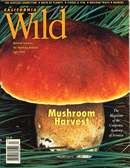
Making
Prints From Mushrooms
An Indoor
Activity for Naturalists
Ida Geary
When the fall rains begin, the wine red mushroom
Chroogomphus vinicolor appears in my garden, soon followed by the
slippery jack, Suillus pungens, with spongelike pores on the underside.
They grow under a Monterey pine, and beyond the drip line various Agaricus
species pop up, looking like the edible commercial mushroom. Sometimes
they also appear in summer on a well watered lawn. With their radiating
gills on the underside of the cap and spores like very fine brown dust,
they make especially dark dramatic prints.
Spore prints are very simple to make: Cut off
the stalk of a mature mushroom where it joins the cap, invert the cap
over a piece of paper, cover it with a clear glass bowl, for protection
and so you can see what is happening, and let it stand for somewhere between
one and 24 hours. The best prints usually come from mushrooms that have
just ripened and opened.
If you think the spores will be dark, place the
cap onto white or light paper, but if the spores look light, use dark
paper for contrast.
When you think you have a print, remove the bowl
and mushroom cap and spray the paper immediately with charcoal drawing
fixative to make the design permanent. You can move the cap after it has
made a light print to another spot on the paper and get a dark-over-light
design. Or put caps down on colored and decorative papers for an added
effect.
Of course, a mushroom sometimes deliquesces, or
melts, overnight on your paper, or something eats the spores, but thats
part of the game. When a print works out well it can look very dramatic
in a small frame or on a greeting card.
|
Fall 1999
Vol. 52:4
|